Radio Bridge Air Temperature and Humidity Sensor
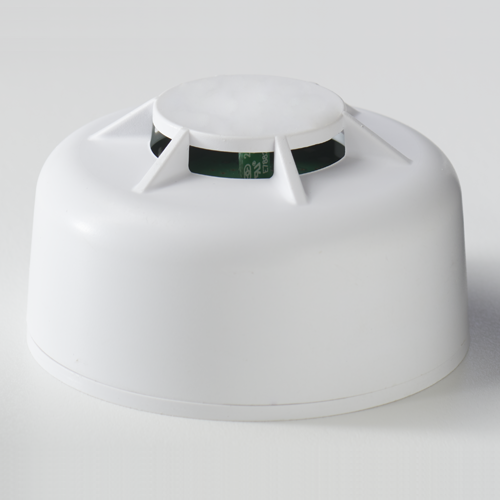
The air temperature and humidity sensor uses air flow to measure temperature and humidity levels. For an Armored Sensor™ IP67 weather-proof version, see the External Probe Air Temperature and Humidity Sensor.
Online resources
You can learn more about the Radio Bridge Wireless Air Temperature and Humidity Sensor product from the manufacturer’s product page here
Using with Atmosphere IoT
You can integrate and use your Radio Bridge Wireless Air Temperature and Humidity Sensor sensors directly in Atmosphere IoT by utilizing an API Project and an account with The Things Network.
By using the Atmosphere IoT Studio project provided in this guide you’ll be able to get the data from your Radio Bridge Wireless Air Temperature and Humidity Sensor device through The Things Network and be able to create dashboards using it.
Setting up Atmosphere IoT
Prerequisite: You should already have an Atmosphere account.
Importing the Radio Bridge Wireless Air Temperature and Humidity Sensor Project into Studio
- Download the following Atmosphere IoT Studio project file and save to your local file system here.
- Navigate to the Studio using the right navigation bar in Atmosphere IoT.
- Click on Import Project and select from the file browser the Atmosphere IoT Studio project file you downloaded in step 1.
- Once the project is loaded click on the Info button at the top left and copy the UUID of the project for later.
You now have the project available in your Atmosphere IoT account.
Setting up The Things Network
Prerequisite: You should already have a The Things Network: The Things Stack account.
Creating an application
When you add your TTN application to your TTN account it is best to name your TTN application the same as the project in Atmosphere IoT in case you need to reference back to the TTN console.
- Log on to The Things Network console, and select a relevant geographic region for your application.
- Navigate to the Applications section of the TTN console.
- Click Add Application.
- Set the Owner and Application ID, along with other details as necessary.
- Complete the process by selecting the “Create Application” button.
Register the End Device
A device must be registered on TTN with the appropriate information to be able to communicate with Atmosphere IoT. Please refer to the designated EUI labelled on your sensor.
- Add a new device to the application just created on TTN.
- Select the appropriate Radiobridge sensor “From The LoRaWAN Device Repository” or under “Manually”
- Enter the appropriate registration data.
- Select “Register end device” to complete the process.
You can register new devices to your TTN application at any time and they'll automatically be added to your Atmosphere IoT account
Setting up the integration to Atmosphere IoT
A webhook needs to be created on TTN that points to your Atmosphere IoT account, so that devices can be automatically registered on Atmosphere, and consequently be able to receive and process data from TTN.
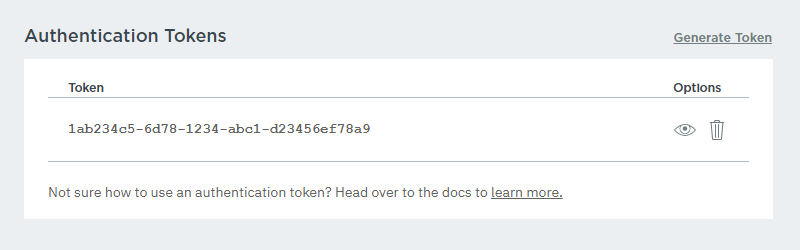
- To generate an API token, open the account menu inside Atmosphere IoT from the navigation bar and click Security.
- In the Security section’s Authentication Tokens area, click the Generate Token button to make a new API token. This will be the token you use to provide The Things Network the ability to send data to your Atmosphere account.
- Select your application in the TTN console, and from its Overview page click on the Integrations entry in the sidebar. In the entry, select Webhooks to add a new HTTP integration.
- Select Custom Webhook.
- In the new integration, enter the following information:
- Webhook ID: The unique ID for the integration; effectively the integration’s name so choose an ID you like, such as
atmosphere-ttn-webhook-1. - Webhook format: Select
JSON. - Base URL:
https://platform.atmosphereiot.com/v2/events - Additional Headers: Provide the additional headers are described below. The headers provide the Atmosphere API with a way to process incoming data in a highly customizable manner, see here for more.
- Method: The HTTP method to use. Enter
POSTin the field if available. - Authorization: The API token you generated from Atmosphere earlier in part 1 of step 3.
- deviceTag:
loraDevEUI - deviceTagValueRef:
$.end_device_ids.dev_eui. - eventPayloadMapRefs:
{"payload":"$.uplink_message.frm_payload", "timestamp":"$.uplink_message.received_at"}. - eventsRef:
$ - integration:
lora - projectUuid: The relevant Project UUID on Atmosphere IoT. When finished click Add Integration to finish the integration.
- Webhook ID: The unique ID for the integration; effectively the integration’s name so choose an ID you like, such as
- Under Enabled messages -> Uplink message, provide the following:
- Enabled: Select the enabled checkbox. Provide a value of
/integrations.
- Enabled: Select the enabled checkbox. Provide a value of
- Select the Save changes button.
With the HTTP integration created, data sent to The Things Network from devices within the application will be sent to the integration end point (Atmosphere IoT).
Registering devices
Now we are ready to register our devices to the TTN network. As devices report data through TTN the devices will automatically be registered for you.
- In the TTN console return to the Overview section and click register device
- Setting a unique ID for the device. Enter a name to reference the device in TTN under the DeviceID field.
- Set the Device EUI exactly as it appears on the Radiobridge device.
- Set the App Key exactly as it appears on the Radiobridge device.
- The App EUI should already be set to the follow that was established in the previous step.