Using Studio Elements
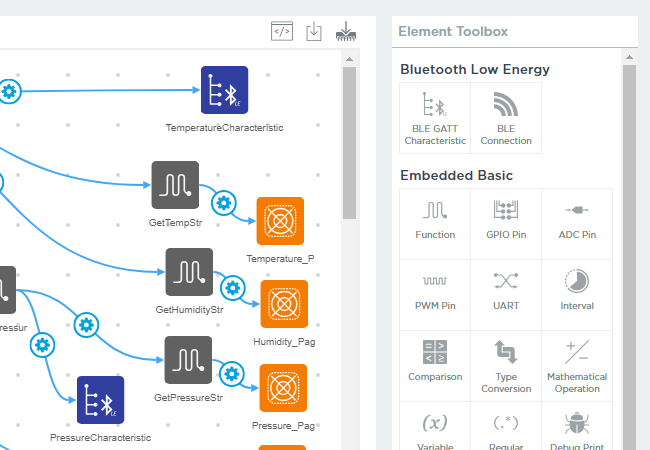
Elements are blocks of code that perform a variety of programmable functions within Atmosphere Studio. Located within the Element Toolbox, elements enable the functionality, visualization, and cloud connectivity for an Atmosphere project.
Adding Elements
Elements are dragged and dropped into a tab’s canvas from the Element Toolbox to visually construct your project, and may also be clicked within the toolbox and added directly to the canvas.
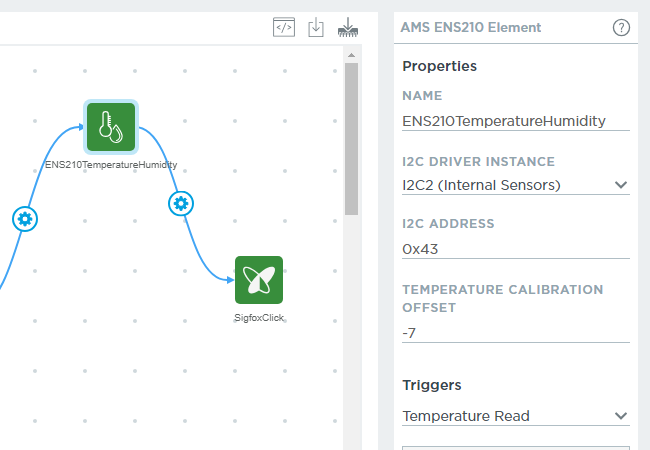
Selecting an element in the canvas displays its properties in the Element Toolbox. Each element has a set of default properties and functionality included within them. Properties vary based on the element, and may be changed based on their needs.
To remove an element, select it in the canvas, then remove it using the  button in the element’s properties.
Connecting Elements
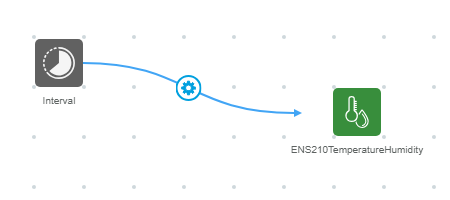
Elements on the canvas can connect to one another to create a chain of functionality between them by using a “connector.” Connectors represent the flow of information from a “source” (beginning) element to a “target” (ending) element.
To create a connector, click and hold the edge of the source element, then drag the cursor to the target element and release it.
Events
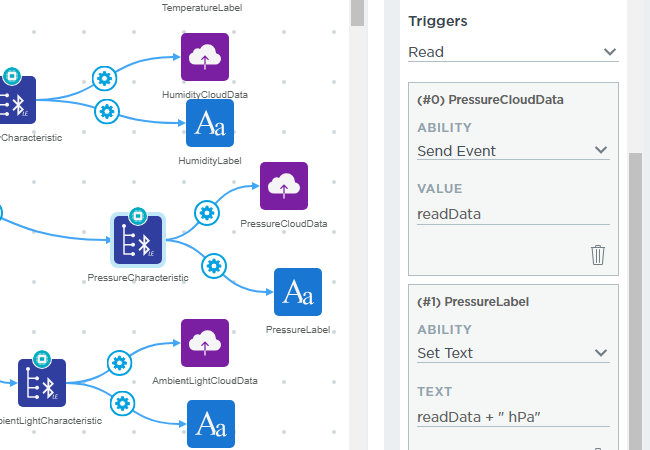
When two elements become connected, it creates an “event” between them. Events define the actions that occur between the source and target element. Every event is assigned to a trigger in an ordered list that are run when that trigger executes.
Events can be modified either in the source element’s properties, or by selecting the connector’s  button between the two elements. Events consist of the following:
- The trigger that causes the event
- The target element
- The target element’s ability
- Any ability arguments or values
Triggers
A trigger causes an event to execute when its condition is met.
For example, a button element has a trigger of
Pressed. When the button is pressed, the events within thePressedtrigger execute.
Each element comes with a defined set of triggers. To select a trigger, choose it from the Triggers drop-down menu within an element’s properties. Each trigger displays any associated events beneath it, or an event can be added for that trigger with the  button.
If an event is added manually from the element’s properties, it prompts you to select a target element within the canvas. Selecting an element then creates a connector between the two elements and adds an event to the source element’s properties for the designated Trigger.
Each trigger may have any number of events beneath it, which execute in the order they are listed. An event can be moved up or down the list using the  button. If an event is deleted and there are no remaining events for any triggers between the two elements, the connector between those elements is also removed.
What exactly happens when a trigger executes?
When a trigger executes from a source element, it runs any events within it in the order they are listed. For each event, the target element’s ability is executed with any arguments passed into it as defined in the event.
Abilities
An ability is an action a target element performs when its source element’s event triggers.
For example, an image element has an ability of
Set Visible, and is connected to a button source element. When the event from the button element triggers, the visibility setting for the image changes.
An element’s abilities are displayed within the Ability field of the source element’s event properties.
Ability Arguments
Abilities contain an optional Arguments field to perform additional functionality. Arguments are initially populated with default values that are available from the source element. Arguments may consist of any valid JavaScript code that can be used for that ability.
The simplest way to think about the ability arguments is that it’s an expression that will be evaluated, and its results will be passed to the ability.
What’s a valid argument expression that can be passed to an ability?
Any JavaScript can be evaluated for the argument being passed into an ability, and the properties that the source element exposes as variables in the evaluation of the argument’s expression.
For example, if you connect a slider element to a progress bar element, it creates one event for the slider element’s Changed trigger. This event uses the Set Value ability of the progress bar and passes the value to the Value argument, which corresponds to the property of the slider element that contains the current value the slider is set to.
To provide a glimpse of what you can do within the connector itself, you can change the argument for the Value field to the following expression:
value + 10
This will take the current value property of the slider stored in the “value” variable and then add 10 to it. You can do an even more complicated expression by simply wrapping your code into a function, like the following:
(function() {
	if(value > 10) {
		return 100;
	}

	else {
		return 0;
	}
})();
Now you’ve added a more complicated expression within the connector, which when evaluated will return “100” if the value is greater than 10 and 0 for any other value.
Can any JavaScript really be run?
You only have access to the variables passed by the source element, and only makes available the variables that the element deems appropriate to expose to the connector’s argument code.
This means any code written inside an event can’t access external variables and references that are otherwise commonly available when writing JavaScript, such as for a web browser.
Can I write JavaScript for events in the Embedded tab?
Atmosphere currently only supports passing one ATMO_Value_t data structure from one embedded element to another. These values are exposed as the input arguments for the variables as in and out.
Support of the argument features for elements within the Application and Cloud tabs will be available in the future.
